Pingus on Android – More Collision Detection
It is a good thing that I’m not trying to make my living with this little project, given the slow forward progress. However, there is continued progress on the collision detection compared to my last update Pingus On Android – Early Collision Detection .
As you can see from this video, things are still a bit twitchy, but at least Pingus is able to step up and down. To get to this point, I considered a couple of options for improving the collision detection in the system.
-
Use the OpenGL stencil buffer
While this might be an interesting approach, the stencil buffer is not guaranteed to be available on all devices. -
glReadPixels at collision point
Using glReadPixels “around” the point of a potential collision might be possible, but appeared to be a fairly expensive operation. In addition, it would be difficult to determine whether a pixel was “ground or “solid”. -
glReadPixels to build a full collision map during startup
This approach would be an improvement over continually using glReadPixels, by caching the results, but suffers from many of the same problems. In addition, the cached image would be large if 4-byte pixels were used.
Pre-generated Collision Map
In the end, I decided that the best approach was to use an external tool to generate a collision map. Unlike many other games, the Pingus world is fairly static, allowing the pre-generation of the map. It is clear that some future aspects of the gameplay will require more dynamic collision detection, but pre-generating this much of the collision map offered a lot of positives:
- Allowed the hard work of calculating the collision map to be moved outside of the constrained mobile environment.
- Allowed the collision map output and associated object wrapper to be tested outside of the constrained mobile environment.
- Allowed the collision map data to be heavily processed to provide the smallest usable map.
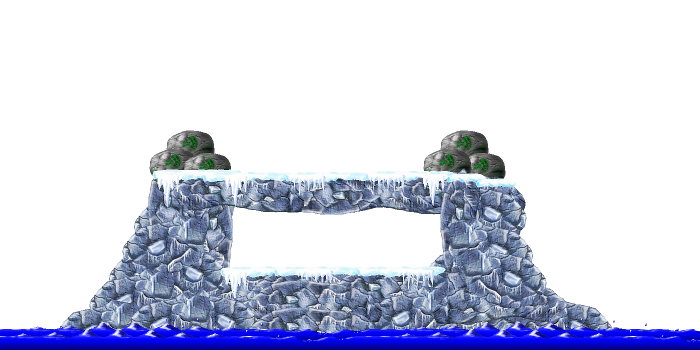
Initial Map Image
The first step in the generation of the collision map is to create an image representing the world objects. This initial image is generated using the Java image API’s in the RGB colorspace using the full color sprite images. Between the bit-depth and the excess transparent space in the image, this image is much larger than needed for the collision map. The following image (scaled down), demonstrates the wasted space.
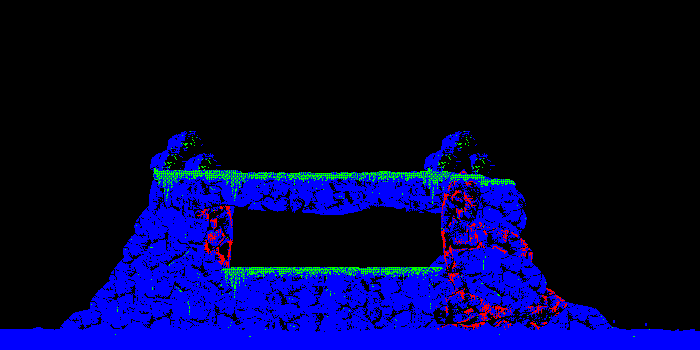
Indexed Image
In an attempt to reduce the size of the individual pixels, the image was converted to a indexed color model. However, the Java image API’s will always attempt to match the closest color, yielding a collision map that looks like the following. Just not quite what we need.
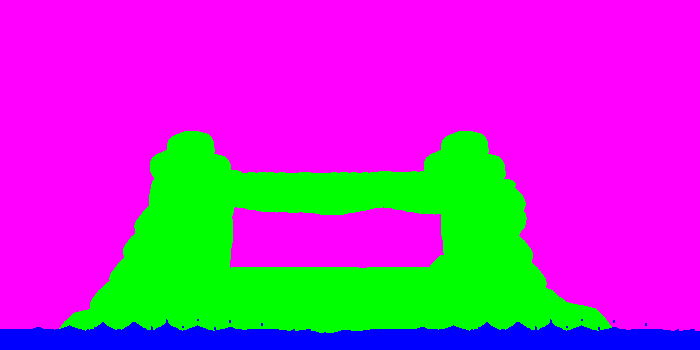
Indexed Image Corrected
Instead of drawing the sprite images directly into the indexed collision map, it is necessary to first convert the sprite images, marking opaque versus transparent images before drawing the collision map. In the following image, the colors have been mapped to mean:
- cyan – Transparent
- blue – Liquid
- green – Ground
- red – Solid (not shown)
The original PNG that this scaled version originated from is 1400×700 pixels and is 3.5K on disk (with compression, etc). Uncompressed, it is a fairly large image to deal with in memory.
It turns out that dealing with alpha values in the Java image library is somewhat tricky. The way alpha is dealt with depends on the underlying color model that is being used. To avoid having to always check during the conversion of the RGB sprite images into the opaque/transparent image, the following class helped.
	class ColorMapTransparencyHelper {
		private ColorModel colorModel;
		private boolean hasTranparentPixel;
		private int transparentPixelRGB;

		ColorMapTransparencyHelper(ColorModel colorModel) {
			this.colorModel = colorModel;

			if (colorModel instanceof IndexColorModel) {
				IndexColorModel indexColorModel = (IndexColorModel) colorModel;

				int transparentPixel = indexColorModel.getTransparentPixel();
				if (transparentPixel != -1) {
					hasTranparentPixel = true;
					transparentPixelRGB = indexColorModel.getRGB(transparentPixel);
				}
			}
		}

		boolean hasAlpha(int rgb) {
			return hasTranparentPixel ?
				(rgb == transparentPixelRGB) :
				(colorModel.getAlpha(rgb) != 0);
		}
	}
Crop and Corrected Indexed Image
The final step was to eliminate as much transparency as possible. The following cropped image is the final image result. The PNG image in this case is 1400×440 pixels and compressed to 3.1K.
Moving Beyond the Image
Originally, I had thought I would use a packaged PNG image as the basis for the collision map on the device. While this might have worked out, the biggest problem was that the Android graphics API does not make it easy to get the index of the pixel rather than the RGB value. The multiple conversions required to deal with the image as a collision map ended up being more heavyweight than it seemed worthwhile. Thus, the final step the tool takes is to convert the PNG image into an array of bytes representing the states of the pixels. These bytes are written to the package and read by the device as the collision map.
The model class that wraps this data is aware of the transparent regions that are not part of the collision map values and those are automatically taken care of by the model class. This yields a very simple API for callers:
public class CollisionMap {
	public static byte PIXEL_TRANSPARENT = 0;
	public static byte PIXEL_SOLID = 1;
	public static byte PIXEL_GROUND = 2;
	public static byte PIXEL_WATER = 3;

	/**
	 * Get the collision value at the specified location.
	 *
	 * @param x
	 * @param y
	 * @return
	 */
	public byte getCollisionValue(int x, int y);

	/**
	 * Get an array of bytes representing the map values for the specified
	 * column.
	 *
	 * @param x_start
	 * @param y
	 * @param width
	 * @return
	 */
	public byte[] getHorizontalCollisionEdge(int x_start, int y, int width);

	/**
	 * Get an array of bytes representing the map values for the specified row.
	 *
	 * @param x
	 * @param y_start
	 * @param height
	 * @return
	 */
	public byte[] getVerticalCollisionEdge(int x, int y_start, int height);

	/**
	 * Set the specified collision map value.
	 *
	 * @param x
	 * @param y
	 * @param value
	 */
	public void setCollisionValue(int x, int y, byte value);
}
With the collision map in place, it is then possible to query for information about the world around the Pingus. This information will be further useful in implementing things like the visual world map and determining whether a Pingus can dig at a particular location.
To be continued…


Very nice! I’m newbie with AndEngine so before I see your videos, I was thinking that it will be only possible to build with it some games with regular shapes (defined with 8 vectors maximum). You’ve showed me a new way for futur beautiful and interesting games!
Is your project OpenSource? I mean is it possible to see all the source code?
Anyways, congratulations and good luck!
Glad to hear that the posts are of interest to people. Knowing that makes it worth continuing to to do them.
At the moment, I’ve been keeping the source to myself other than the snippets I’ve posted in the blog entries. I haven’t really decided what I’m going to do with this project in the long run, so I’m holding on to the code for now.